Sunday, February 24, 2013
Pipe restoration: F&T Reject
Whilst smoking my new (well new to me) Mastro De Paja I rummaged yet again through the box of pipes from Germany. I was looking for something that was more than just dirty, I wanted to tackle something that required a bit of lateral thinking as well. I found this F&T (in a horizontal diamond) that was also stamped REJECT...I wonder why!
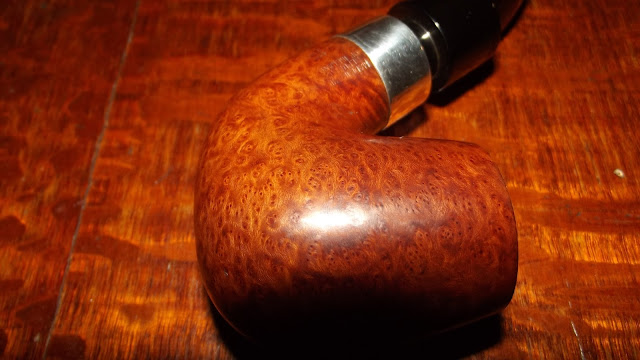
Despite the LARGE hole in the side of the bowl this pipe has obviously been smoked heavily. Just goes to show what an amazing wood briar is. As you can see from the photo below this pipe was made from quality briar. Love the birdseye.
I was originally thinking of just chopping off the top and making a pot. A pretty easy thing to do and I would have a nice bit of briar to use for something else in future. But, the more I looked the more I thought, "I want to keep that birdseye intact". Here is a side view of the pipe, it is a very comfortable shape in the hand.
So, a few flicks of the wrist with my Rotring 600 (look it up, great pencil) and I came up with an adaption of a Danish freehand style that still leaves at least a 30min smoke in the bowl. Something like...
This would also allow me to bend the stem (I found one in the box that I can make fit) slightly so that the pipe can be smoked at about 45 degrees to horizontal (an angle I find very comfortable) without getting gook all over the rim. Also, this should give a very pleasing sweep of birdseye along the entire rim.
More updates to follow!
PS> F&T stands for Fribourg & Treyer. They were an old British tobacconist based in London originally. Prior to the War they had a well-respected market in tobacco and pipes. Some sources say the pipes were made for them by BBB. They were bought out (like MANY companies at the time) by the Imperial Tobacco Company (ITC) and disappeared. Today there are still tobaccos made with their name attached (made in Germany). It might be fun to get a tin to smoke in this pipe if it turns out well!
Cleaning: Boiling water candidate
After the aborted 'Olroth's Import' boiling water trial I decided to select a new pipe that I KNEW I wouldn't mind breaking. So, I rummaged through my box of pipes from Germany and came up with this...
I'm assuming this was from the same smoker as the Olroth's. The same gook on the rim, the same chamber with only the top half having any space left. This time, however, I attacked it with the British Buttner right away. This worked well, until that is the Buttner was required to cut downwards at depth. It's tips are not effective at this, so I had to first open it up with some auger bits, then finish with the Buttner. Even then it could not reach the bottom as this chamber requires something that can ream parallel to a depth of greater than 1".
I can't even remember what was stamped on the side of this one, I'm fairly certain though that it is not even briar. I'll edit this post when I've gotten further along the track! One thing is for certain, I don't care in the slightest if this pipe explodes, so it WILL be subject to a full boiling water experiment.
Tool Review: British Buttner pipe reamer
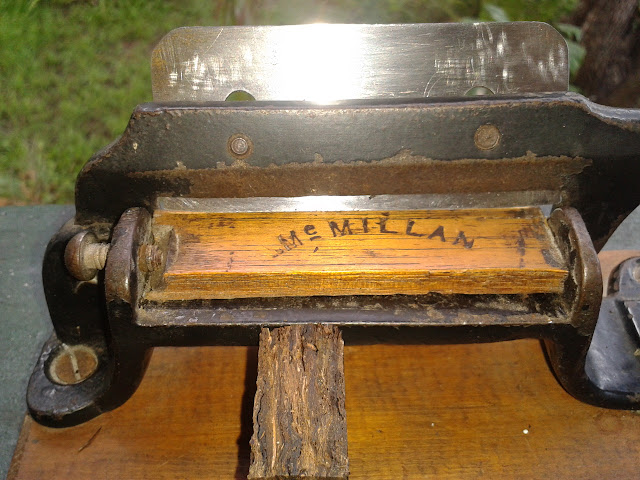
The British Buttner pipe reamer has been around for a long time. As far as I can't find it has been made since 1945. It's a funny tool to use, but once you get the knack of it there is little it can not do. It's made from hardened tool steel and has ground edges.
The ground edges are an important feature. Take a close look at the photograph below. You can see that the left blade has rounded edges and the right has 90 degree sharp edges. If you turn either blade over you will find that they change from ground to rounded or vice versa.
In the photo above you can also see the ramped central pin. The further back you slide this the more each blade attempts to become parallel to it's mate. If you hold your pipe with tobacco chamber facing down, insert the tool, then slowly jiggle the ramp further in, it is quite easy to quickly and accurately adjust the Buttner reamer to the angles of the chamber.
Below is a photograph with the central pin fully retracted.
The tool is excellent at removing cake. However, there are a couple of design issues that prevent it from scoring full marks.
1. There is a degree of lateral movement in the blades. I worry that with use this will get worst and compromise the cutting ability of the tool.
2. The t-handle, whilst effective, is hard on fingers if used for any lengthy period of time. Only an issue when dealing with badly caked estate pipes though.
3. Blades can never be made parallel. I have a few pipes (pots for example) that have parallel sides. However they represent only 3-4 pipes from my entire collection, so this is no great worry.
4. Cutting roundness is compromised by operator error. If you are pushing slightly to one side or the other the tool will cut more from that region. I combat this by rotating the pipe slightly every few turns so that no one spot is having all the fun.
Measuring across the tops of the blades (at the last point of contact with the bowl) reveals a maximum width of 1 3/8" with ramp fully inserted and 3/4" with ramp fully retracted.
Pressure steam cleaner for pipes
This is what I've been thinking about for the last week, a high-pressure steam cleaner for pipes. Advantages:
- pressure
- uses water not chemicals
- made from mostly items you have at home (or could find in rubbish)
Components:
1. Stove-top espresso coffee maker
2. Tubing
3. Balls the size of car batteries
4. Large tapered cork (to fit wide variety of bowls)
Only three issues:
1. The steam tube in my espresso maker would get blocked by simply putting a tube over it as the discharge holes are on the sides. If I find a junk one (or my old one that broke) I could drill a hole in the top so that this was not an issue.
2. The tubing would have be able to stand high heat (not a big issue) but also be neutral in taste. Maybe something a medical supply company would have? I think surgical tubing would melt, but then again it's only hot for a second...
3. What happens if something blocks the pipe, where does the pressure go? If you didn't clamp the hose at either end then that would probably be where it blew...I guess the solution would be to clean the pipe as best you could then use the steamer as the last step.
The only question is which way to blast the water, through the bowl or through the stem. Not sure about this one, arguments either way.
Subscribe to:
Comments (Atom)


