
So you know the story, up late one night and decide to buy a
box of pipes from Germany. There were 24 in the box, all disgusting. This one,
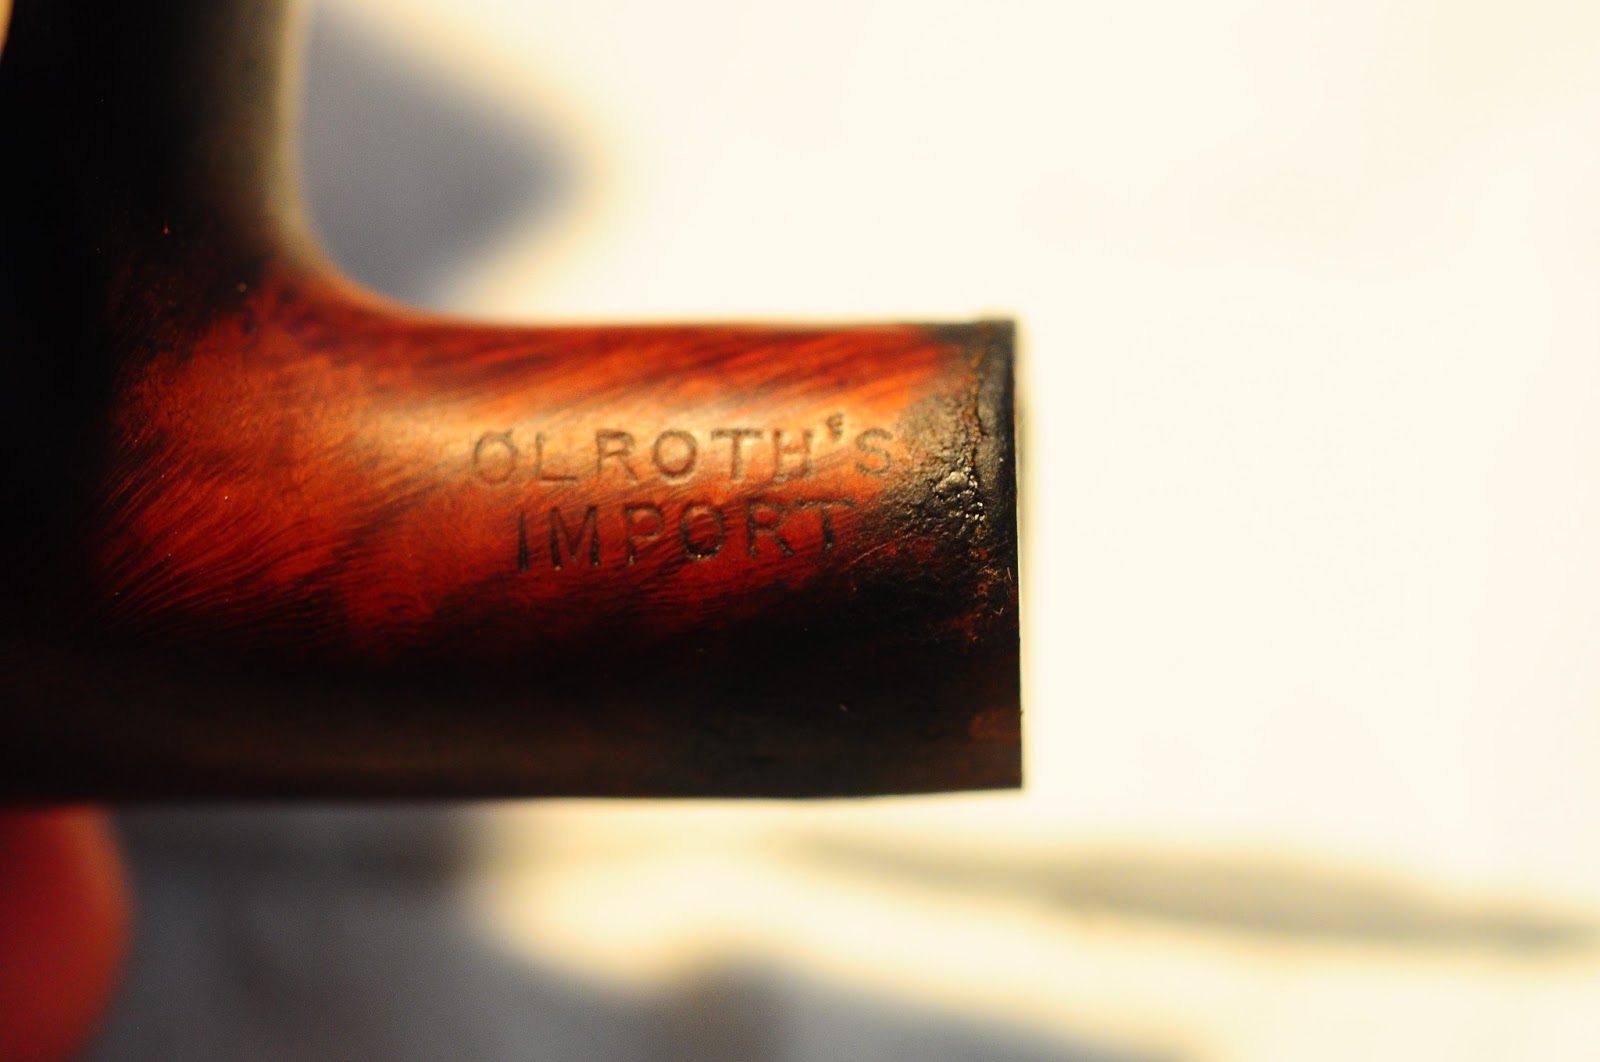
an Olroth's Import (Made in London - England), was a stummel and smoked to the
point of having no draft hole, and no tobacco chamber either really.


First up was to fill the bowl with boiling water. I've used the technique before to remove cake, but never this much. The first try blew straight through the chamber and leaked out the shank, strike one up for boiling water. As you can see the 3-4 seconds it spent in the pipe was not in vain.


I then corked the shank with a piece of folded and rolled cling-wrap, made a pretty good seal. As a bonus it kept water off of the crack in the shank that I was to discover later. The first two minute soak helped soften the cake a little, and then I soaked for another three minutes. All in all though it was still hard going. Below is my progress after an hour of scarping with the pipe tool. That pile is ½ an inch tall! Look at that water as well, blech.

Being night it was hard to get photo’s of my progress (parallax error with flash and couldn't be bothered digging out the ring-light but below is an attempt to show how much bigger the tobacco chamber had gotten. Apparently the bottom half of the bowl was solid cake and the top half was only pencil thickness in size.


I then went to bed and continued the next day. I broke out my ‘British Buttner’ reamer. I had never liked the design but then again I never really had a pipe with a thick enough cake to try it on. That and it always felt a bit harsh on the pipe. After some experimenting I came to the conclusion that it is an excellent reamer, and once you sort out how to adjust the sliding and ramped central pin properly it works quite well. I added a second pile of cake to the first, and although hard to see I can assure you that both piles are ½ an inch tall and about three inches long.

Below is the chamber after reaming. It had started to rain so the photo’s are inside and taken using a torch. A bit of a difference!

Next was the rim. At this point I was thinking of refinishing the whole pipe. I almost got a knife and scraped the rim back, but then decided to go slow with some water and a tea towel. I cleaned away the outside edge of the rim first, then polished into the pile of accumulated tars.

The original intention was to use this pipe as a 'who cares if it cracks and explodes' test dummy for a thorough boiling water cleaning experiment. But as the layers of tar and grime started to disappear I started having second thoughts about a final boiling water treatment…after about 15 minutes of dip-and-rub…no sanding, just a bit of slightly soapy water and a tea towel this is how the rim looked.

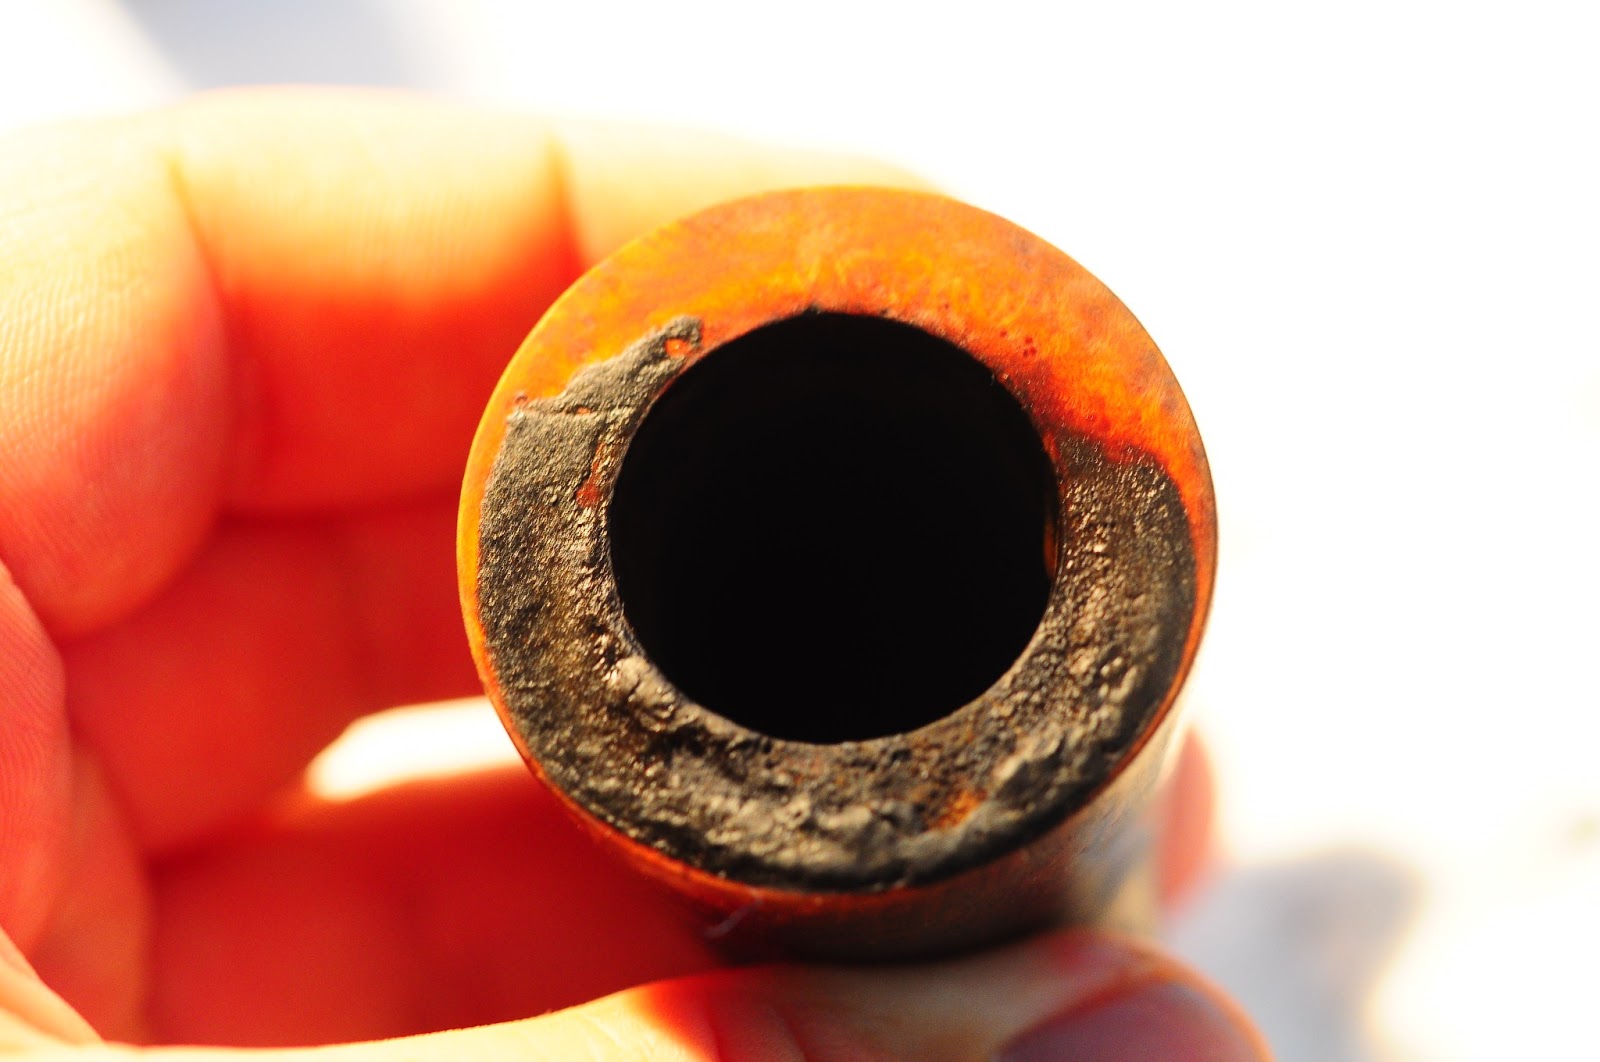
The shank was my next target. Inside and out it was full of goo so hard that it needed drill bits and vice-grips to break it up. The outside got the wet-towel treatment fist, came up well, but I discovered a crack in the shank on the bottom. An easy super glue job, but I'd rather not. I hate the thought of putting super-glue in pipes. Instead I'll order some nickle rings and press fit one on.


Before and after shots. Same exposure settings at this point, note how much lighter the wood is. I decided to give a section of the bowl a quick rub with the wet tea-towel.

Same difference in color seen on the top of the bowl from overlap of the towel when polishing the rim.

Below are some shots of the grain starting to come out after years of grime are removed.


Inside the shank, dear gawd.

Exploratory tea towel so I could figure out what was wood and what was gunk before drilling…

After going through .5mm half steps in both the shank and draft hole I had my third pile of crud, will it never end!

At this point I decided to see if I had a bit that I could test-fit to see if I liked the shape of the pipe. Found this…part way through cleaning I found ‘Italy’ stamped on the bottom. That was soon sanded off.


Super boiled some water and immersed the bit completely for 20 minutes. Came out like this…

I sanded with 340, 800 and 1200 wet-and-dry, then realized I wanted to polish it a bit to see what it would look like…SO, who needs g-clamps or zip-ties when you have a tree and a bungee cord?? So loud, nuts to the neighbors, I have earmuffs.

It was rock solid, absolutely perfect…it is the new system. I then buffed, reformed, recut and adjusted the taper and length of the tenon. I then gave everything a quick buff. I don’t have any carnauba yet…and still have to finishing defunking the inside of the pipe…and fit a band…but, here is the progress so far.


