
Original post: http://www.blogger.com/blogger.g?blogID=8973241885352057854#editor/target=post;postID=6542537167165137799
----------------------------------------------------------------------------------------------------------

I wanted to cut slightly into the large fault to get a cross section of it (just to have a look inside). After removing the cut piece it became obvious that the previous owner of this pipe for some reason consistently burnt his tobacco hotter on the left hand side. Maybe he smoked with an open window to his right. The cake of the left side is visibly thicker and the depth of char penetration is significantly greater. Even if this pipe gets thrown in the bin it was worth it just to see the inside of smoked pipe's wood. Note also the roots/veins of tar radiating out from the bowl, I never would have guessed that tars migrate through the wood in this fashion.

Below is a color shot of the uneven char and the tar penetration pattern. Also note that a second fault had opened up at this point, right next to the first!

After sanding with 80 and then 120 grit sandpaper I had been forced to modify my original design to accommodate a variety of faults in the wood. I wonder if every pipe has these things lurking in their bowls...probably. It must drive pipe makers to the edge of insanity. All that work and then suddenly during sanding something appears. Note in the photo below that the second major fault has played out, but the first has continued to worsen. The tar penetration/migration pattern has also started to resolve itself. I'm thinking that is will look great polished up.
I decided to give the pipe a rest, grab a cup of tea and take a look at the bit. The pipe design then had time to percolate in the back of my brain. The bit was in the usual nasty shape. Nothing 340, 800 and 1200 grit sandpaper couldn't fix though. In the second photo below I've tried to capture those little crystals you get on very old and grotty stems. Sulphur perhaps?


After about 10 minutes work the bit came up ok. I've not finished it as it will be sanded again during final fitting to the pipe (the pipe's shank is a slightly larger diameter than the stem). I just wanted to make sure there were no major issues with the bit before I proceeded with fitting.

Time to return to the stummel. The choice at this point was to leave the existing 'stuff' (possibly rotted wood or an old bit of branch or root) in place an polish over it...or break out the awl, remove the loose matter and find something to fill the hole with.
I opted to remove the material - for two reasons. Primarily, it would annoy me forever to know it was there. But, I have also been toying with an idea for another problem; pink putty. I have a number of reject pipes that have incredible grain. They all, however, also have that grotesque pink putty in them. I've long suspected that makers use this terrible color of putty to discourage people from buying the seconds instead of the firsts. Why else would you consistently get the color match SO wrong?
Back on topic --> Many people have had great success with the 'briar dust and superglue' method of filling pits. I...despise...the idea of putting superglue into a pipe, it just seems so...wrong. Heck having a plastic mouthpiece is bad enough, if only amber was affordable, I'd have all my pipes converted. Vulcanite (or ebonite) is a great substance for our purpose, but I hate putting it in my mouth each and every time. what are the alternatives? Really only amber and horn. OR (and this is a long shot) glass... maybe ceramic. Pyrex/glass would be completely neutral - great. As would good ceramic though. Ceramic, being essentially clay would seem to be a closer fit with the wood. I've been thinking of asking a local potter to have a crack at a ceramic bit for one of my pipes. The only issue will be strength in the mortise/tenon area. shall have to ask them.
Back on topic, sorry --> So, natural filler for large pits/fissures/faults. The current idea is to harvest some sap from a native tree. There is a tree (a large eucalypt) near my house that has large globs of blood red sap coming out of a gash in it's bark. I smelt it the other day, no obvious odor (may be different when heated). The only question I have is whether or not it will be stable under heat, namely will it stay in solid form and will it endure the swelling and contracting of the wood around it. Once again, this pipe will be the test dummy - time will tell, if not the first smoke!
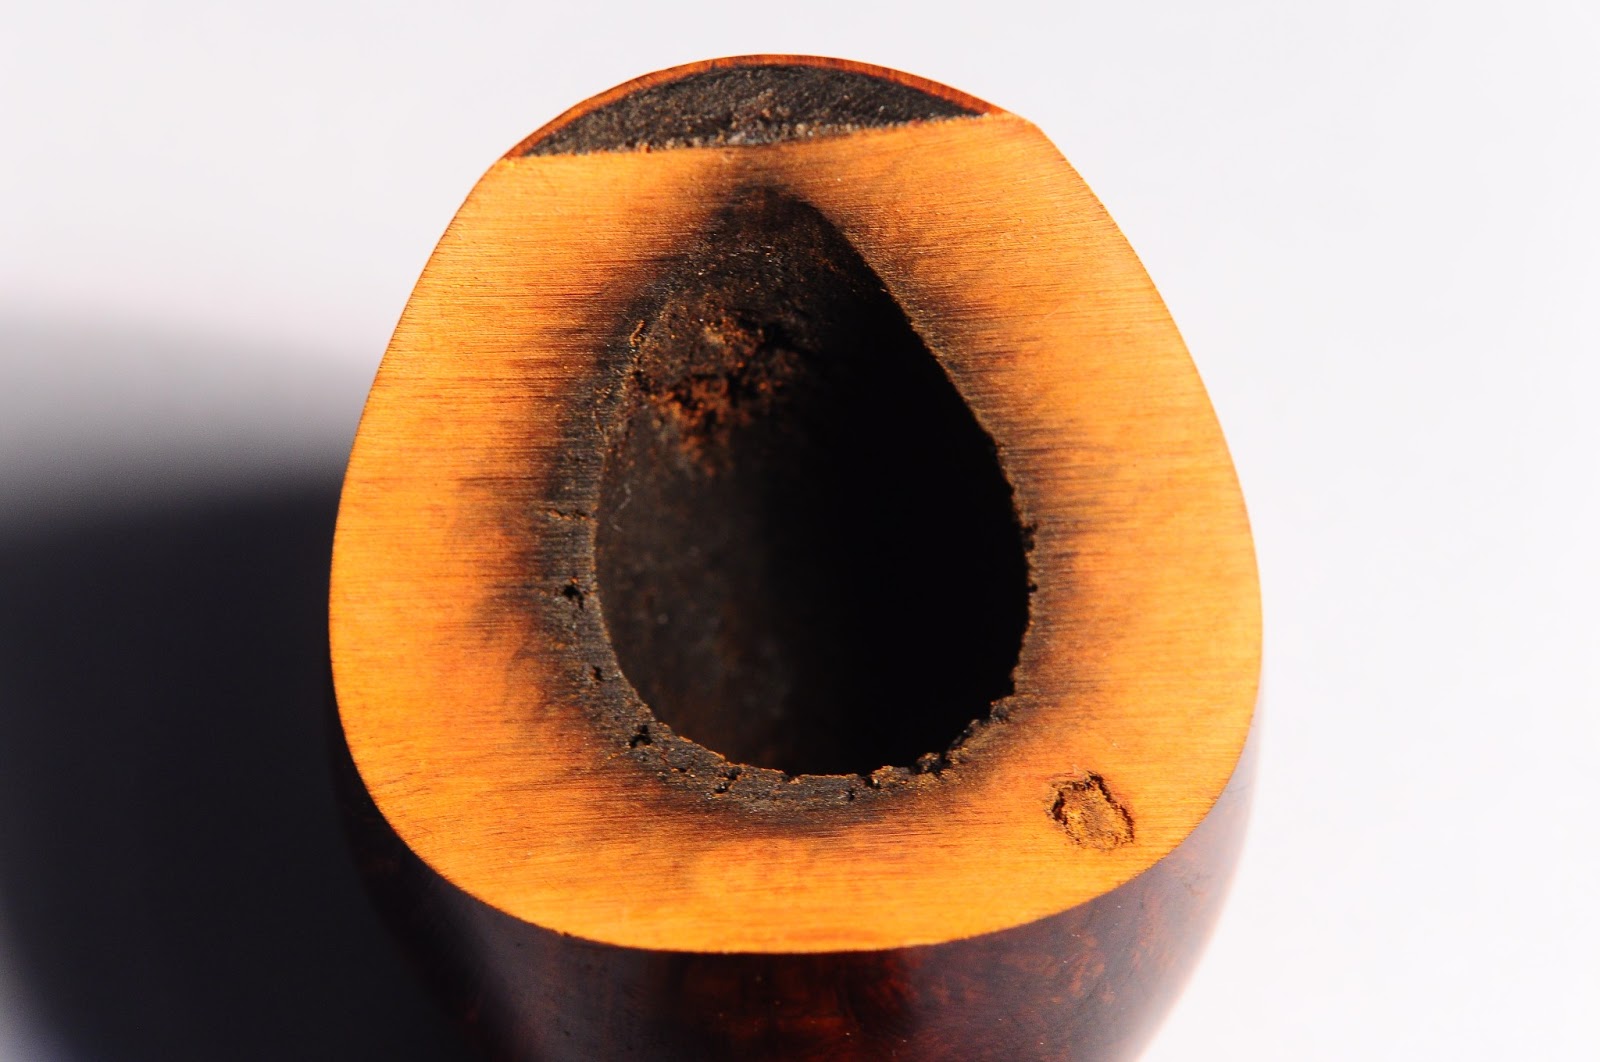
Below is the hole left once all the loose matter had been removed. It's difficult to see, but that hole goes down another 4mm. Wowzers.


At this point I was getting worried about tobacco chamber depth. As you can see from the photo below, I have had to remove far more material than originally expected.

It dawned on me that I couldn't see the draught hole. I tried pushing my awl through the shank an into the bowl, it wouldn't go through. Interesting. None of my reamers would cut into the smooth cake at the bottom of the bowl. Out came the 8mm drill bit which I rotated by had in order to find the bottom of the bowl. 5mm later the draught hole finally came into sight. How is it possible to cake 5mm OVER the draught hole?

So, depth problem sorted, just have to make a reamer that will bite into the cake and remove it all to bare wood. I think I've got that sorted, tomorrows job!
To be continued...


